 |
| *Reference photo from Amazon.com |
I could have gone about this the easy way and just sculpted him out of some air dry clay, painted him, and called it a day, but that's just not my style. I had been reading about some molding and casting techniques I wanted to try using plaster, silicone caulking, and hot glue.
Let's get started. (If you just want to see the finished prop skip to the end of this post)
 |
| Wire armature for to build clay on. I twisted it to make it stronger. |
 |
| Started adding oil-based clay. Really liked this clay, it was very firm on held its shape. |
 |
| Worked the clay a bit more. |
 |
| Decided it would be easier to sculpt the head separately. |


 |
| Got the basic shape of the head done. |


 |
| Added the facial features. |

 |
| I wasn't happy with the original hair. This is version 2.0 |
 |
| Added the details on the suit. |

 |
| The model is done at this point. Now I am attempting to make a mold of the head using 100% silicone caulk from Home Depot. |
 |
| Long story short. It didnt work. I wasn't able to inject enough caulk to get all the way to the bottom of the head. Then, because the caulk was so thick not enough air could get in there for it to dry all the way. |
 |
| Attempt #2 here. Placed the head on non-porous surface and added a "spout" at the bottom so I would have an area to pour casting material into the mold. |
 |
| Fist coat of caulk. This time around I added the silicone in thin layers letting each dry before adding the next. |
 |
| For the body I did a combo mold of silicone and Plaster of Paris. (If you look close you can see plans for me next project. Any guesses?) |
 |
| I placed the model face down on a bed of more oil-based clay and smoothed it out not leaving any gaps for the plaster to seep into between the model or on the side of this box of foam. That wood dowel at the top is so I can pour the casting material in later. |
 |
| I coated everything with cooking oil and filled the box with plaster. |
 |
| Here is the model in the dry plaster cast. I added some keys with a drill to help line up the two parts of the mold. |
 |
| On the front side of the model there were a few areas with undercuts that if I had used the plaster it would ruin the model when I tried to separate the two halves. I used silicone in thin layers like with the head to make this part of the cast |
 |
| More silicone. |
 |
| Building up the back where I will cut a seam to release the model. |
 |
| More silicone. |
 |
| Ditto. |
 |
| Success! Here is the model and the finished silicone caulk mold. |

 |
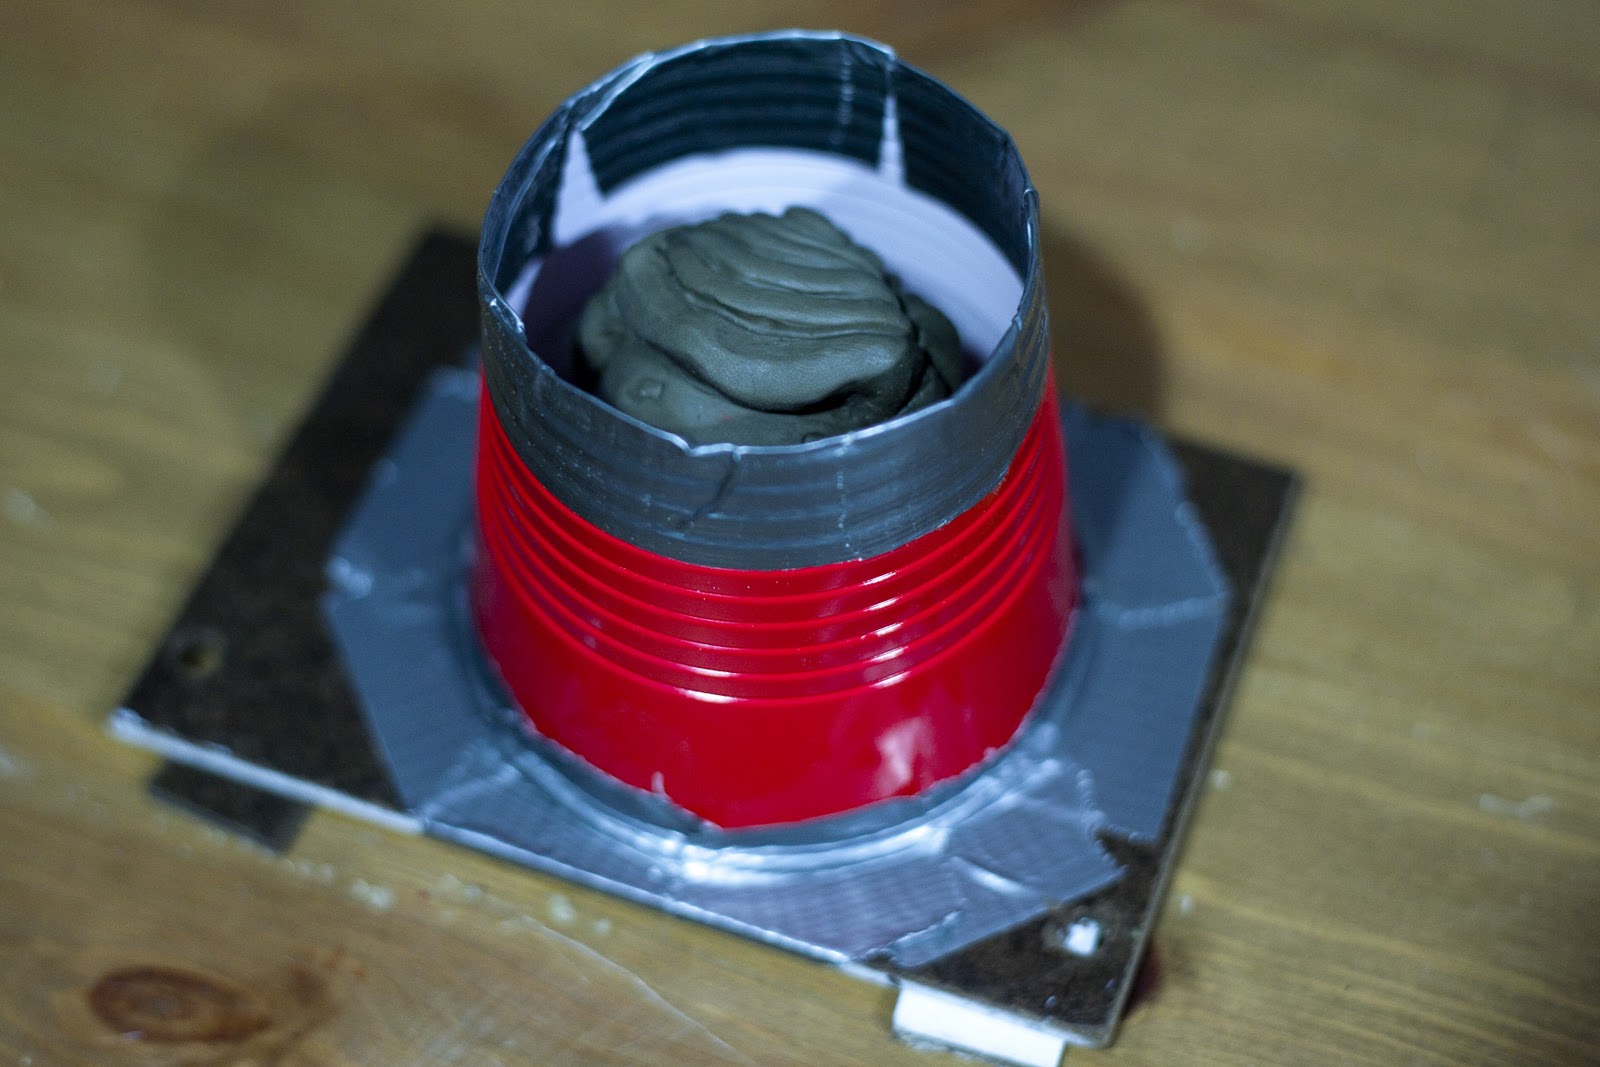
| Getting the head mold ready to inject some hot glue to make my first cast. |
 |
| Here is the first cast. Pretty happy with how it turned out. |
 |
| Sorry, missing some photos here. After building up layers of silicone I filled in the rest with plaster to make the mold more solid. Here is the three pieces. The bottom, the silicone layer, and the top "shell" layer. |
 |
| Ready for hot glue. I sprayed everything with oil again. |
 |
| I injected hot glue into both halves an then some into the top. |
 |
| The first cast was okay, but there were a few areas where the glue didn't fill in the mold so I had big gaps in the legs. The second cast was much better. |

 |
| It was a lot easier to see the problem areas with a coat of primer. |
 |
| Lots of little bubble from the hot glue to fill in. |
 |
| I filled in the gaps with a combination of hot glue and then some epoxy putty. |

 |
| I really got the hang of the epoxy putty and ended up coating pretty much the whole model and sanded it smooth. |

 |
| Another coat of primer. Then painted with acrylics and a glossy top coat. I made a spring from an old notebook so the head would bounce around. |
 |
| Here is the finished project. I made the base out of some scrap pine and painted it. Only took me 3+ months (an hour or two here and there when I had the time). |


All in all I am very happy with how my second prop building project turned out. The proportions aren't quite right. His head should be bigger. I had a hard time with the paint. The yellow I used over the brown primer ended up looking green. I was able to fix it but it wasn't easy. I tried brushing on the glossy top coat rather than spraying and some of the black from the base got mixed into the blue on his pants. I wanted to put the "Vault-Tec" logo on the front of the base but could not figure out a good way to do it.
Anyway... Fun project. Time for the next one.
Things I learned:
- Reference photos are key. Study them closely.
- A good wire armature is very important. Make sure it is strong and the right size. Everything you do from this point on depends on that armature.
- If I were to do this again I would have just sculpted it in air dry clay. I don't plan on making duplicates, but going through the mold/cast process was a great learning experience.
- If making a silicone caulk mold make sure you do it in thin layers so it will try. You can add things to help it dry. I used a pin to punch holes in the thick areas to air could get in and dry it out.
- Don't try to brush on glossy spray paint. It didn't work for me, just smeared the paint around.
- I had wanted to add some lettering to the front of the base on this model but didn't have any luck. I tried to make a stencil and paint over it but the paint just seeped in around it and made a mess. I might be better off just have a sticker or a decal made and slap that on there later.
Here are some of the tools and materials I used for sale on Amazon.com
*Some of these are not the exact product but comparable to what I used.


